How img2img Diffusion Works
Running Stable Diffusion by providing both a prompt and an initial image (a.k.a.”img2img” diffusion) can be a powerful technique for creating AI art.
In this tutorial I’ll cover:
- A few ways this technique can be useful in practice
- What’s actually happening inside the model when you supply an input image.
By Chris McCormick
Contents
1. How it’s used
1.1. Art from a Doodle
I’ve seen some artists leverage this by first creating a “doodle” of the artwork that they want (i.e., a low-quality version of what they’re trying to make), and then feed this through Stable Diffusion to create something of higher quality and with different styles.
Reddit user and artist TheZakMan shared this example of his workflow here:

(You’ll find in his post that he also took the result back into photoshop to do some additional painting, then sent that through Stable Diffusion again!)
I’ve found a caveat of this approach to be that the background of a scene can be harder to draw if you’re not an artist, and it doesn’t work to leave the background of your doodle white / empty and expect the model to fill it in.
1.2. New Art from Existing Art
Another approach that I like to take is to find a piece of human-made artwork that I like (usually on DeviantArt), and start by feeding it through an “Image to Prompt” tool (a whole other topic!) such as this simple, web-based (and free!) img2prompt tool:
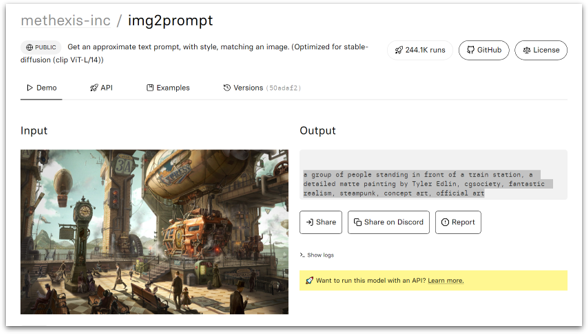
The tool gave me the following text prompt:
a painting of a train station with people walking around, a detailed matte painting by Tyler Edlin, cgsociety, fantastic realism, steampunk, matte drawing, concept art
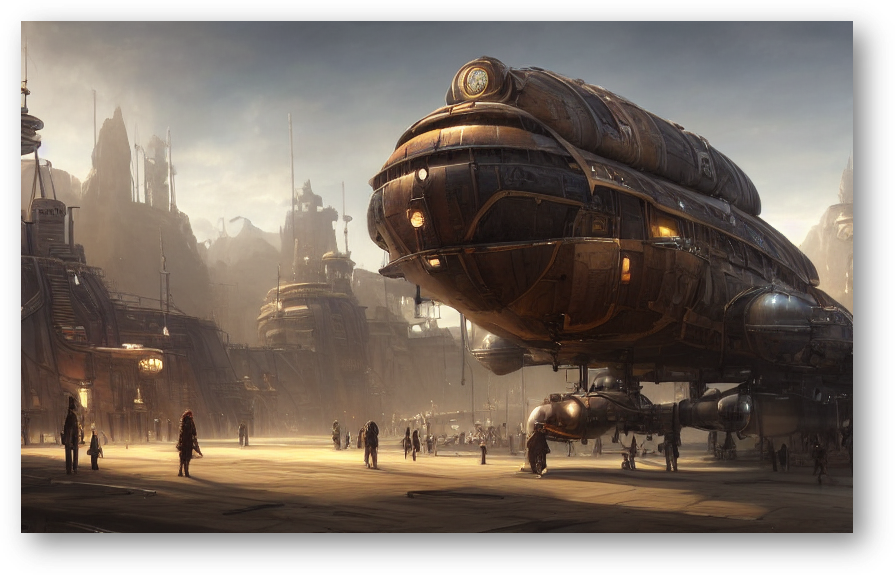
I fed this prompt (except I replaced “train station” with “steampunk airship station”) and the initial artwork through img2img, and generated 15 images. The results looked great–here is one of my favorites:
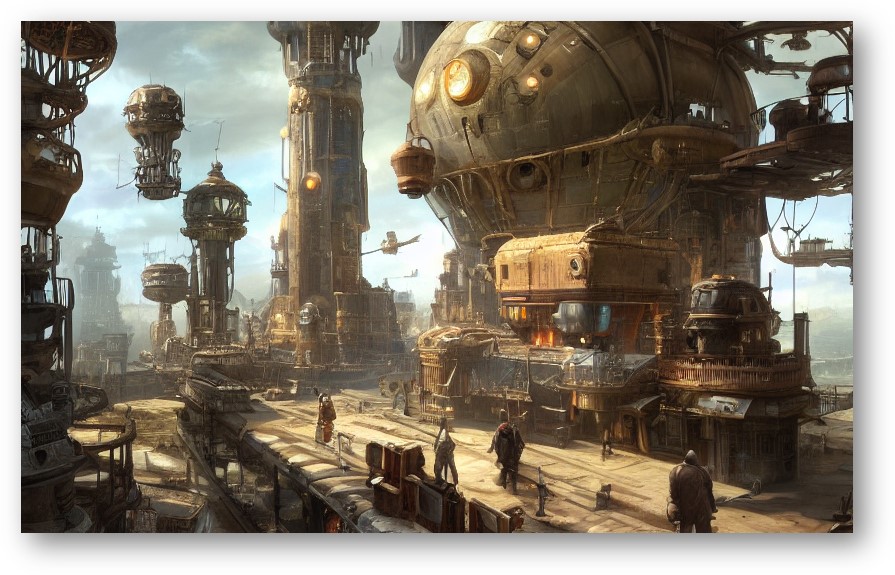
You also have the ability to control how similar the outputs are to the input image; here’s an example that’s much closer to the original:
1.3. Image Layout
In both approaches, img2img seems like a great way to control the overall layout of the image you want to generate.
Providing an initial image means that more of your generations should adhere to the composition that you’re after.
Perhaps it also makes it easier for the model to understand what the image is supposed to be?
2. How It Works
2.1. Removing Noise
In a normal text-to-image run of Stable Diffusion, we feed the model some random noise. The model assumes, though, that this input is actually a piece of artwork that just had a bunch of noise added.
So, using the text prompt as a source of “hints” for what the (supposed) original looked like, it does its best to recover an image from the static. It does this over a bunch of steps (e.g., 50), gradually removing a little more noise each time.
With img2img, we do actually bury a real image (the one you provide) under a bunch of noise. And this causes Stable Diffusion to “recover” something that looks much closer to the one you supplied.
2.2. The Image/Noise Strength Parameter
There is a parameter which allows you to control how much the output resembles the input. Different tools use different names for it, but it’s a value from 0.0 - 1.0, with higher values causing the output to deviate more from the input.
The way this works is that we’re going to add noise back to your input image over multiple steps in the same way it was done to originally train the Stable Diffusion model.
For the purpose of illustration, let’s assume that we’re running diffusion for 50 steps.
This image strength parameter just corresponds to what percentage of those 50 noise steps we’re going to add to the image.
For example, if you set the value to 0.8, then we’re going to add 40 “slices” of noise to the image, and then diffuse the noisy image for 40 steps.
To illustrate this, I’m going to use this image of Gene Simmons from the band Kiss as my input image, and provide a prompt with the subject “A Xenomorph playing a guitar” (In case you’re not familiar, ‘Xenomorph’ refers to an alien from the Aliens movie series).
If we set the value to 0.8, we’ll add 40 steps of noise.

Adding 40 steps of noise makes the original image completely imperceptible to my eyes, but rest assured it’s still present enough to influence the diffusion process!
Side note: The code adds an offset of 1 step, so it’s actually 41 steps, but I’m omitting that detail to avoid confusion.
Here’s what a value of 0.5 (25 noise steps) looks like–you can start to recognize the original image in the noise. I find that the results tend to be lower quality at such a low value, though.

Below is an illustration of the full set of intermediate noise images. It’s pretty huge, so you’ll want to open it separately for a closer look.

I also found it interesting to compare a plot of the noise schedule to these images–you can see how the model makes its most dramatic modifications to the image in those early steps.
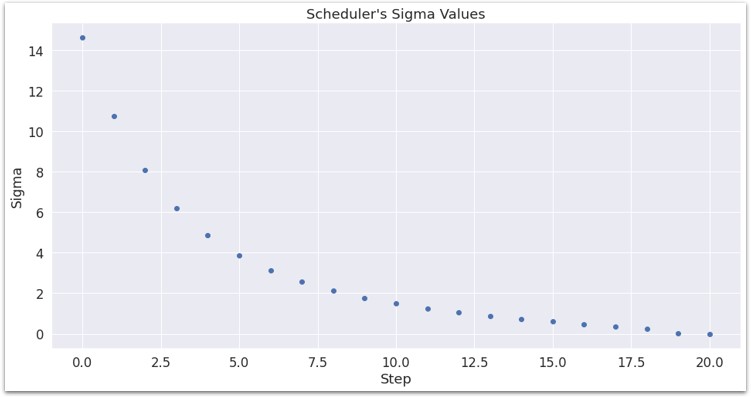
(The above plot was for num_steps=20, not 50, but I think you get the point just from seeing the general shape)
2.3. Noise Strength = 1.0
A common misconception is that setting the value to 1.0 completely destroys the original image, but that’s not quite true–the original image is still involved and still has some influence over the output.
In the below example, with the strength set to 1.0, you can see evidence of the original image:
- It replaced the airship in the top left with another airship.
- The clock and pillar were replaced with mountain peaks.
- The sky has roughly the same shape and placement.
- In all of the examples I generated, there was a large structure or airship on the right hand side.
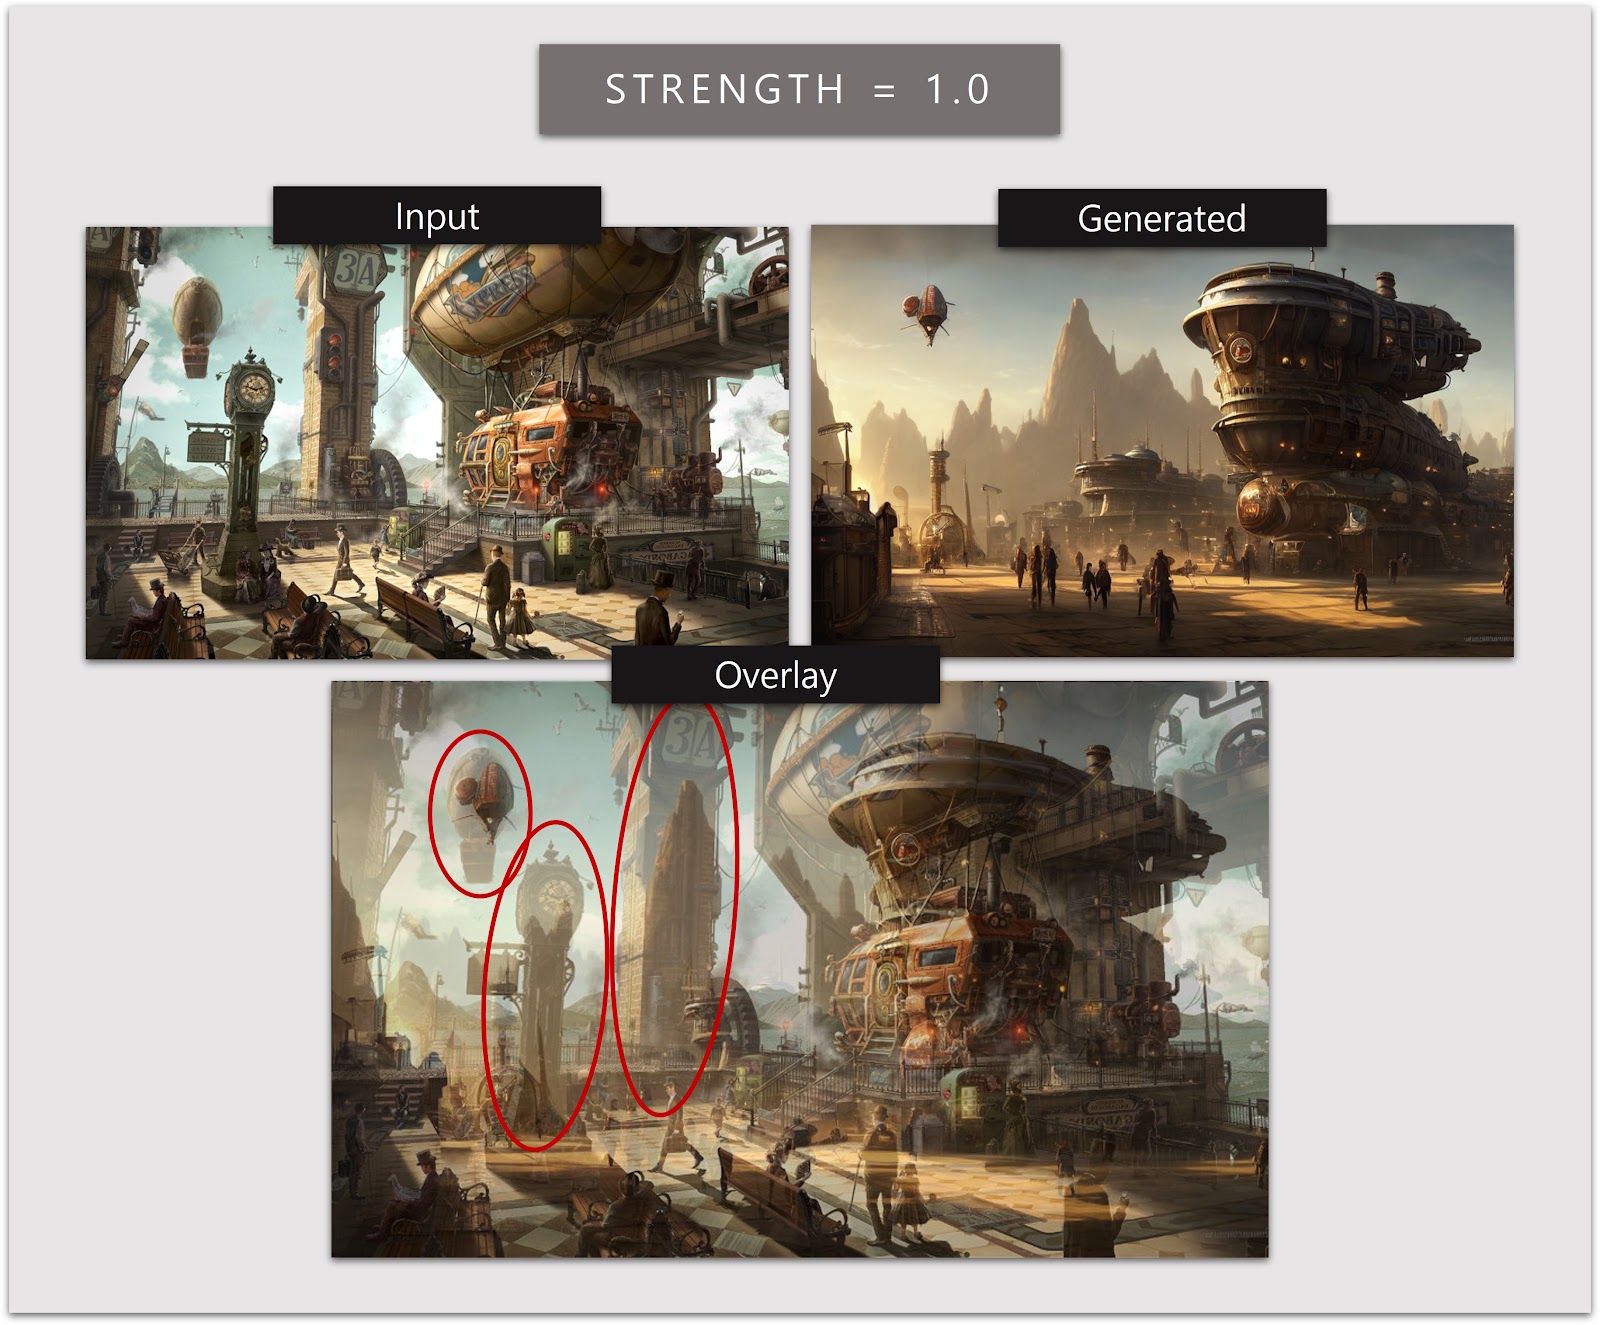
In fact, my experience has been that a strength of 1.0 actually generates some of the best images! I think you can view it as giving the model maximum artistic license, and that seems to be where it performs best.
Here’s my favorite Xenomorph result, with a strength of 1.0 (this is the same image as the top right of that giant illustration):
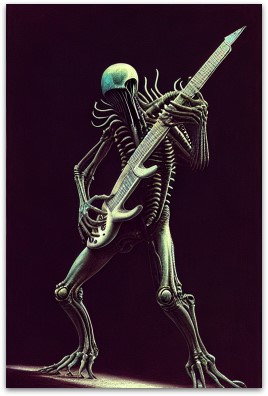
“A Xenomorph standing on a stage playing a stratocaster guitar sticking out its tongue by giger, Zdzisław Beksiński, greg rutkowski”
Happy generating!
Appendix - Tools
Img2Img is a common feature that you’ll likely find in any art generation tool.
The quickest way to get going is probably to use DreamStudio (a paid tool that gives you free credits to start).
The most popular open-source tool seems to be Automatic1111, and this video can show you how to get it running on a free Colab GPU.